
3 Simple Steps How to Start Your Own Travel Blog in 2021
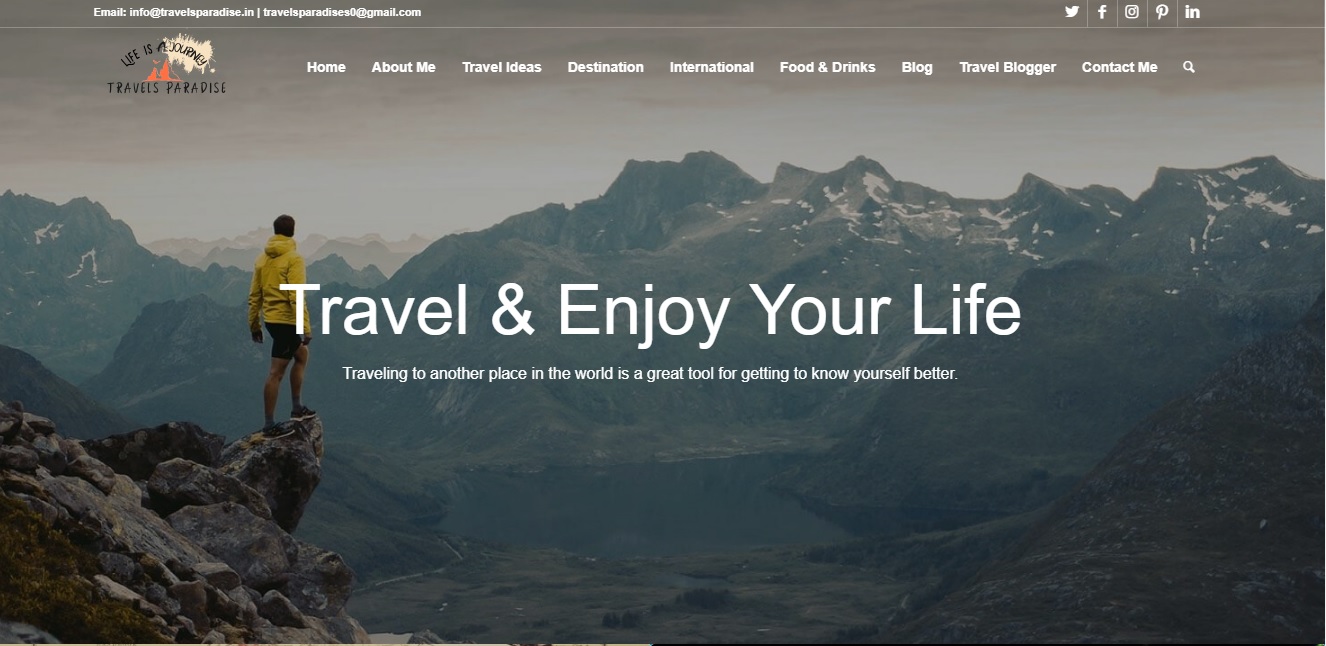
Whether as a hobby or profession, starting a travel blog is pretty easy. you’ll set it up in under half-hour. It’s tons easier than once, Hey I am Saurabh Gupta I started my blog in 2020. I am Digital Marketer & Social Media Manager Being a full-time working professional, my creativity didn’t get a chance to shine that way. After some time, I went to visit Darjeeling, a place with the reflection of nature’s beauty. There, I felt I was leaving imaginary me somewhere behind and decided to visit those far-off places I’d dreamt of as a kid that’s why I started this blog.
When I came home and decided I wanted to start out this travel blog, they agreed to assist me to set it up and teach me HTML. I hand WordPress & coded the website and used a cool Paid tool called Seoprofiler & Ubersuggest to create it and find errors which are a very helpful tools.
Luckily, you not need to build websites that way!
Creating an internet site has gotten tons easier and simpler because of WordPress, an out-of-the-box platform designed to form sites easier). It powers over 25% of the web and is that the best platform to start out a blog on. It’s super flexible and may do whatever you would like it to try to to — from an easy journal to complex blogs and e-commerce websites.
In our blogging masterclass, we’ve had thousands of scholars start an internet site on WordPress with very easy. They got them up and running — and you’ll too!
Here’s my ultimate guide to starting a successful travel blog!
- Establish Your Audience (Not a Niche)
- Get Your Travel Blog Up and Running
- A Travel Blog Name
- Set Up Your Domain + Hosting
- Setting up Your Blog on WordPress
- Connecting Your Google Analytics
- Customizing Your Site
- Branding + WordPress Themes
- Logo + Design
- User Experience
- Essential Plugins for Travel Blogs
- Start Creating Content
- Set Up Your Main Pages
- Learn SEO Basics
- Create a Content Schedule
- Create Beautiful Images + Graphics
- Join My Blogging Course
- Bonus Step!
Establish Your Travel Blog Audience
Step 1: Establish Your Audience (Not a Niche)
Before you’ll start a successful travel blog, you’ve got to work out if there’s an audience for it. the most important question you’ll wear your mind is “Who will read my travel blog?”.
Some people start blogging for fun, and it slowly evolves into a business—and that’s awesome! But, if you’re trying to create a travel blog from the bottom up with the potential to show it into a business, you would like to make an idea before you start .
First Things First: Determine what you’ll write on . Not just “travel.” Dig deeper. there’s a technique to well-rounded content. For me, it’s a balance of travel guides, destination-based content, photography tips, and traveling & lifestyle posts. I also sprinkle in bits of my personality with my love for Harry Potter, In N Out, and skin diving .
Next, determine how you’ll shape your content for your audience. Who is your target audience? on behalf of me , it’s 20 to 30-something Men & women with a passion for travel and unique experiences. While my audience will undoubtedly deviate from this (I want everyone, including all my Viewers and Subscriber, also to read my blog!), it’s essential to stay my audience in mind in the least times in order that I create content they’re going to love.
Then, research if there’s already someone writing about an equivalent thing (niche, topic, etc.). If so, ask yourself how you’ll roll in the hay differently or better. There are tons of travel blogs out there, and you would like to differentiate yourself.
When you’re creating a travel blog, it’s essential to consider your audience every step of the way. Write for yourself, but don’t forget to also write for your audience. If you’ve got this found out from the start , you’ll be ready to create quality content from day one.
I balance my writing with helpful guides (like this one) and travel tips for my audience, with photography-driven content and private writing for myself. i prefer to think I distinguish myself by putting quality content first. that has professional graphic design and epic photography as something my audience has and always can expect from me.
Before heading onto Step 2, inspect my tips on:
- The way to Make Your Blog Stand Out from the gang
- Setting Up Your Travel Blog
Step 2: Get Your Travel Blog Up and Running
Now I’ll walk you thru the step-by-step process of fixing a WordPress blog!
1. Come Up with a reputation
Think about names which will grow with you. If you name your travel blog “A Month in India,” it’d not be relevant during a year. Remember that your name is a component of your brand, and you’ll likely persist with it for the lifetime of your blog. Aim for something that isn’t limiting and is memorable.
After you’ve narrowed it down, trust your gut and choose one.
Quick Tips for selecting a Memorable Name:
Make it Unique: There are countless travel blogs already using commonly used travel words like “Adventurous” “Wanderlust” or “Wandering.” Think outside of the box! Ask friends for help if you get stuck!
Keep it Easy to Remember: Having an extended name that you simply constantly need to spell out, which readers could misspell is branding suicide. Avoid in the least costs!
Avoid Confusing Words and Punctuation: Hyphens and anything aside from .com are often confusing!
Synergy: Avoid having different names for your website and social accounts. If an account for the name you wish isn’t available on one platform, consider modifying everything to match. you would like to be easy to search!
Think About the Future: does one always want to share recommendations on budget travel? Or Indian adventures? If i made a decision to vary my hair color, things could have gone a touch off-brand 😉 Don’t pigeonhole yourself into a distinct segment brand if you anticipate your content might grow with you as a traveler.
Once you’ve got an inventory of possible names, check to ascertain if the domain is out there (that’s the URL of your website) which it’s available across social platforms.
I love to challenge my advice, so also consider that picking a really niche brand could even be strategic. “A Month in India” might be a massively successful blog if the content is solely focused on India forever. Understand the private connection to your blog and if you’d want your content to reflect your personal journey, or if you’d be comfortable with it remaining a distinct segment brand that you simply operate as a resource.
Despite how important a reputation seems, I also don’t believe that it’s an enormous deal. Your voice is more powerful than your name. Branding has numerous layers; the name is merely the primary layer, so it’s not necessarily the top of the planet if you don’t pick the right one. the most important mistake you’ll make is holding off on starting a blog because you can’t pick a reputation .
Just. Start.
If you’re stuck on finding a reputation , think about using your real name! Don’t forget that you simply are a private brand.
2. found out Your Domain and Hosting
Know the difference between your domain and hosting!
If this is often your first website, there are probably a couple of terms you aren’t conversant in that you’ll got to learn. You’ll want to understand the difference between a website and hosting. Sometimes, they’re sold as a pair, but they’re very different.
A domain is that the URL of your website. for instance , my domain is WhatAroundUs.Com. to say your website, you’ll got to pay an annual fee for your domain.
When it involves web hosting, we are talking about renting space on the web where your website will live. Of course, you’ll need both.
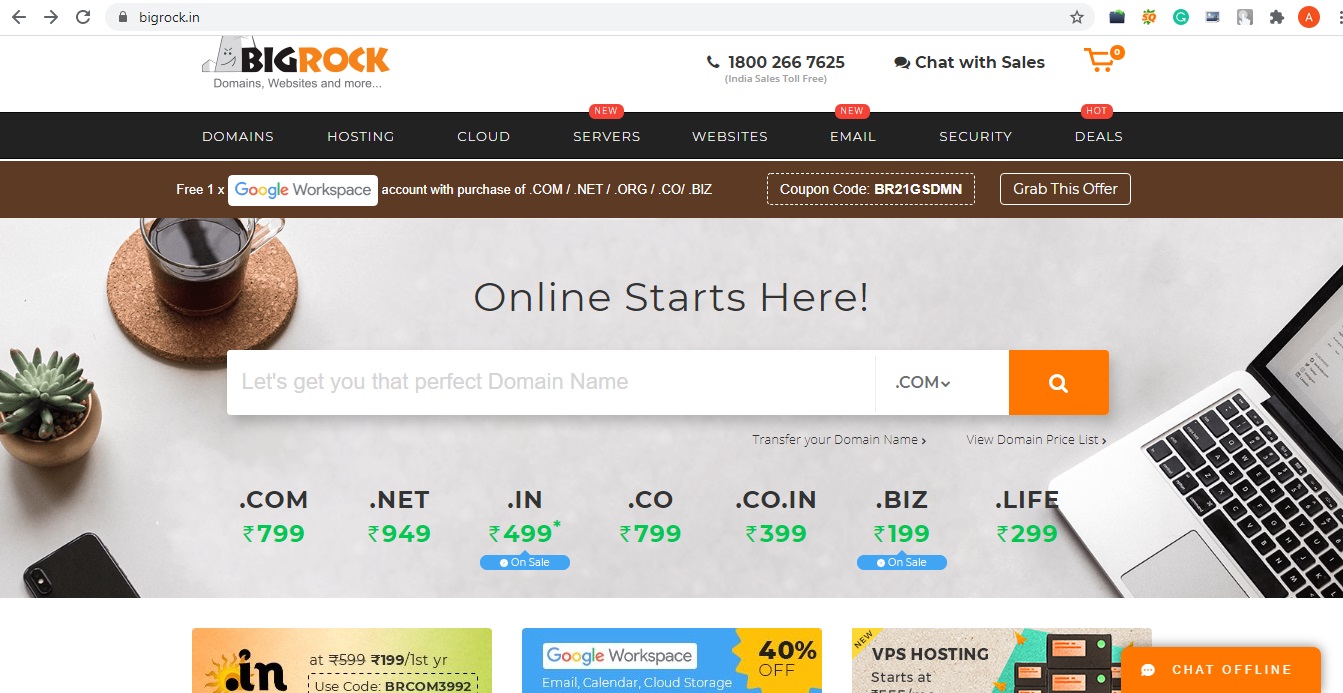
I’m a lover of Bigrock & Bluehost. it’s a reliable and user-friendly web host with customer service there to assist . They also add a free name registration once you check in for hosting, so it’s a win-win. If you haven’t started fixing your site, they even have an easy step-by-step registration that walks you thru the method .
EXCLUSIVE OFFER: once you check in for Bluehost through my blog, you’ll pay just ₹299.00/month instead of ₹919.00/month
Now, I’ll guide you thru the process! Head to Bluehost and click on the green button that says “Get Started Now.”
The Travel Paradise Bluehost
If this is often a fresh blog, i like to recommend the most cost effective plan that’s ₹299.00/ per month. Until you begin getting a big amount of individuals visiting your blog, the essential plan is simply fine. you’ll upgrade once you start getting more traffic!
The Travel Paradise Bluehost
Hit SELECT on the essential Plan, and you’ll be sent to subsequent page:
The Travel Paradise Bluehost
If you would like to look to ascertain if a website is out there , type it into the box on the LEFT.
If you’ve already bought a website , type your name into the box on the proper and click on next. make certain to see the name multiple times for spelling errors! You don’t want to register the incorrect domain accidentally.
On subsequent screen, you’ll choose your package information. You don’t need the bells and whistles, so make certain to unclick those extra boxes:
The What Around Us Bluehost
I recommend starting with the essential 36-Month Plan. It works bent be ₹299.00 per month, instead of ₹919.00 a month, saving you around $5000 within the end of the day . Don’t worry—one of the simplest things about blogging is that there aren’t plenty of costs to getting your website set up! this is often the most important expense of fixing a blog (when you initially start!), and it’s pretty reasonable.
You’ve now found out your hosting and domain! Pretty easy, right? Now, let’s get that website up!
Coding a Blog

3. found out Your Blog on WordPress
Now that you’ve got your domain and hosting found out , it’s time to urge your blog running.
WordPress.org is one among the foremost popular blogging platforms, and it’s what i exploit and recommend— just make certain it’s WordPress.org rather than WordPress.com because you’ll want to self-host and WordPress.com doesn’t allow that.
In general, WordPress is a superb platform for beginners, and it also has plenty of plugins and styles , so it’s something which will grow with you and your audience. there’s a touch of a learning curve, but it’s easy to seek out help and tips online, and there’s such a lot you’ll do with this platform.
I would not recommend another platform like Wix or Squarespace.
While they’re easy to quickly found out , you finish up paying a fee, and you’re very limited with design flexibility. WordPress is free forever and has countless themes and plugins for customization! I’ve known quite few bloggers who started on one among these other platforms, and once they inevitably switched to WordPress, that they had to convert their website over painstakingly. It’s tough . And it’s not cheap to rent knowledgeable to try to to it for you. So, I’d recommend starting with WordPress from the start .
Now, let’s found out WordPress!
Once you’ve signed up for hosting on Bluehost, you’ll be asked to settle on your password for WordPress:
Bluehost Create Password
You’ll then be asked to log in and pick a topic . Don’t worry an excessive amount of about which one to select — I’ll walk you thru fixing a custom theme later. consider this theme as a placeholder, and we’ll upload a far better one later.
Bluehost Pick Theme
After you’ve chosen a topic , click START BUILDING. Now, let’s build!
Next, you’ll be asked whether your website is business or personal. plow ahead and choose business 😉 You go, Glen Coco.
WP Dashboard
Fill in your website’s name and outline within the boxes on subsequent screen. Again, don’t worry an excessive amount of the outline . You’ll want to update it later once you’ve had an opportunity to brush abreast of SEO strategy and your site’s meta description (don’t worry if that’s over your head— I’ll explain later!)
Bluehost Launch Site
Other Blog Set-Up Notes:
Choose “A Static Welcome Page Here.” Whatever custom theme you select later will determine the design of your site, but a static welcome page is what my home page would be considered and more easily customized.
Hit “not now” on subsequent screen. You don’t want the whole internet knowing your address.
Click “not now” when it involves installing WooCommerce. WooCommerce may be a WordPress platform that permits you to sell products (both digital and physical) on your website. you’ll skip this for now and add WooCommerce later when and if you’re able to start selling.
And that’s it! You’re officially a travel blogger!
To log into your site moving forward, type http://yourdomainname.com/wp-admin into your browser, and you’ll see this screen:
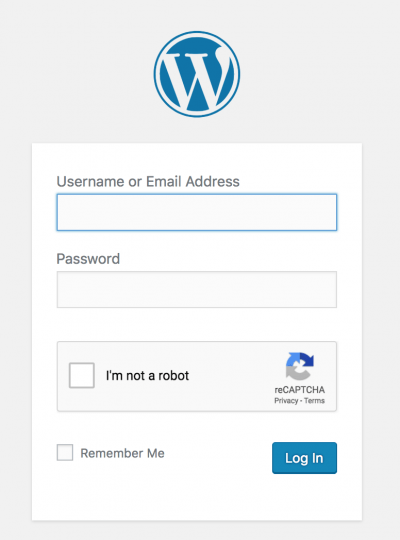
WordPress Login
Type in your username and password, and you’ll be logged into your WordPress dashboard.
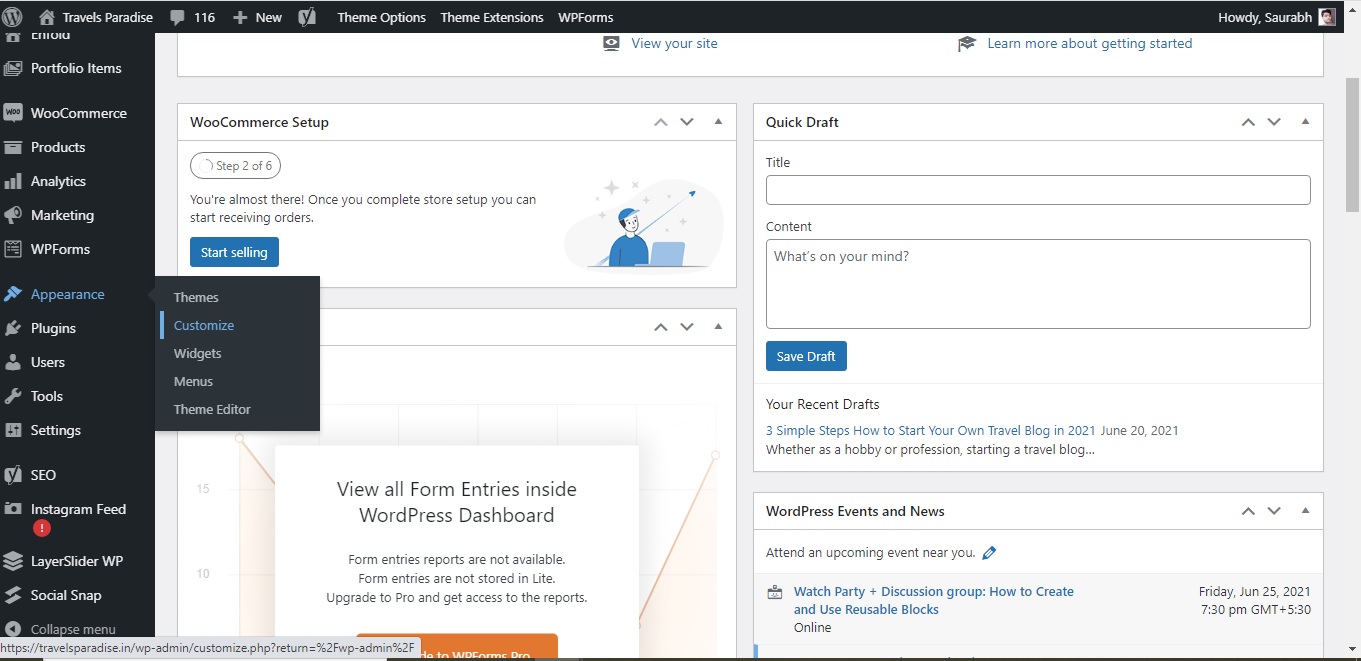
On the left-hand side column of your dashboard, you’ll see:
Posts—this is where you’ll draft and publish your blog posts
Pages—this where you’ll find and build static pages on your site, like an About Me or Contact Page
Comments—this is where you’ll approve, spam, or reply to comments on your blog posts
Appearance—this where you’ll alter the looks of your blog, from installing a replacement theme to adding graphics, changing fonts, editing your sidebars, etc.
Plugins—this is for installing and updating plugins (additional features) for your blog
Settings—here you’ll alter your site settings, tagline, etc.
WordPress Dashboard
To get conversant in WordPress, you’ll find a tutorial for almost anything on WordPress for Beginners.

4. Connect Your Blog to Google Analytics
Google Analytics gives you an in-depth check out your traffic and more information about your readers. You’ll be ready to see incredible details about your traffic, including what percentage people visit your site, how long they spend on your site, where they’re from, their age range, etc.
The Google Analytics website gives step-by-step instructions on the way to get started! The Monster Insights Google Analytics is additionally an easy-to-use tool for getting it installed on your site.
Customizing Your WordPress Site
Step 3: Customize Your Site
Now that the blog is up let’s make it pretty!
Recommended to theme lock best for free find travel theme
1. Branding + WordPress Themes
The most exciting part, in my opinion, is picking out your website theme! A WordPress theme includes page layouts, colors, formatting, and even fonts. confine mind that some themes use “shortcode” which switching themes after you’ve built out tons of content can break your site. While you’ll change your theme again down the road, it’s going to require you to travel through and update code throughout your site (also meaning, you would possibly need professional help).
So, it’s important to think about your long-term branding before choosing your initial theme!
While I could continue for days and days about the importance of excellent branding, I’ll attempt to sum up some key points:
Branding is quite just the colours of your website. Consider all of the layers of your brand—from the colours and fonts of your website to the way you deliver your message.
What is the ethos of your brand? Are you “the girl next door” or does one “tell it love it is?” What does one want your audience to feel once they consider your blog? attempt to pinpoint keywords like friendly, tastemaker, expert, funny, controversial, etc. A successful brand doesn’t mean that it’s for everybody . Sometimes breaking the mold is staying faithful who you’re AND what sets you apart. It’s not always about appealing to an audience of 1 million people.
It’s good to possess a general idea once you first start. From there, it’s important to remain authentic, plan to the concept, and be consistent.
To help put your ideas on paper, build a Pinterest board and compile your favorite colors, fonts, and layouts!
Here’s my Blog Redesign inspo board:Blogging Redesign
Now, let’s find the right theme:
You can find WordPress themes everywhere the web—from marketplaces to individual graphic designers.
Creative Market features a ton of lovely themes by designers, and you’re ready to read reviews before purchasing.
Envato (formerly referred to as ThemeForest) is one the most important , high-quality marketplaces of WordPress Themes that I’ve seen. I built my old website with the Avada theme (the #1 rated theme).
Elegant Themes is additionally a superb resource for creative and unique themes.
There are thousands to settle on from and most home in price between $30-60. While there are free themes for WordPress, I’d highly recommend investing during a premium theme. It’s alittle price to buy a beautiful site which will grow with you over the years.
You’ll want to form sure that whichever theme you choose is for WordPress, which it’s mobile-responsive and offers customer support.
Once you’ve bought a topic , it’s time to put in it on your site.
Themes will usually include installation instructions, but these are likely the steps you’ll got to take:
Downloaded the .zip file (don’t unzip the file)
Log in to WordPress
Click on Appearance > Themes > Upload
Upload the .zip file you’ve just downloaded, then follow your theme instructions for customization!
2. Logo + Design
Some WordPress themes have a built-in “logo” meaning they will display your blog name within the header, which could be fine when you’re first starting out. If you’re curious about getting a customized logo or graphics for your blog, there are a couple of ways to travel about it.
First, you’ll teach yourself the fundamentals of Adobe Photoshop, and make a logo and graphics using your branding colors and fonts. However, this will be a time-consuming route. For complete beginners, i like to recommend Canva Pro — it’s an excellent resource for designing brand elements and graphics! they need thousands of templates, stock photos, and premade graphics for almost everything, and are very easy to customize.
Creative Market has many premade logo templates, fonts, patterns, and textures that you simply can incorporate into your website and branding elements — it’s heaven for stepping up your aesthetic!
Logo Templates
Another option is hiring a contract graphic designer to develop your logo and/or graphics, which is what i like to recommend if you’ve got some allow design. you’ll find great freelancers on Upwork and Fiverr (get 20% off your first order!), and you’ll just pay per job! Always make certain that your freelancer has good reviews and a portfolio that has designs that are in line with what you’re trying to find .
Home Office Inspo
3. User Experience
Take baby steps, and know that everything doesn’t got to be perfect within the beginning.
Once you’ve got your theme installed, it’s important to form your website as user-friendly as possible. The way that somebody navigates through your site is named “user experience.”
Check out your favorite websites, and see how they organize their information. Do they need drop-down menus, or feature their top content on their homepage? Take notes on what you favor .
Take some time to make a clean and fresh-looking site that’s easy to navigate, but don’t obsess over every detail. Create a general aesthetic, and you’ll fine-tune and alter sections of your site as you create more content.
Set Up Your Menu Bar: one among the foremost important things to line up first is your menu bar in order that your readers can easily access information. In your Dashboard, click on Appearance > Menus to customize. It’s helpful to research a tutorial on customizing your menu because it are often confusing!
Map Out the Layout of Your Homepage: I find it super helpful to draw the planning of a homepage on paper with mock content boxes (that are available within the theme). Then, when everything is sensible , I build it.
Consider user experience when customizing your site design, then address plugins to intensify the performance and further customization of your blog.
4. Essential Plugins for Travel Blogs
WordPress has easy-to-use plugins, like Yoast SEO, which will assist you optimize your website and blog posts for Google Search, et al. like Askimet, which manages spam comments. You’ll also find that no single WordPress theme does it all, so you would possibly got to address plugins for personalisation with things like image sliders, social sharing icons, etc.
Here are my favorite plugins for WordPress:
Akismet Anti Spam: Websites get attacked with spammy comments every minute. Akismet catches and deletes them automatically, so you don’t even see them.
Yoast SEO: Yoast SEO makes it very easy to enhance your blog post and page rankings in Google Search and is that the go-to SEO plugin for WordPress. They even have plenty of resources if you’re just learning about incorporating SEO throughout your blog. you’ll also verify your Pinterest account through the plugin.
Google Analytics: this is often the industry standard analytics program, and provides you with such a lot important information about your posts, pages, and audience.
Social Warfare: an excellent social sharing plugin.
BackWPup: Always, always copy your site!
Grammarly: While Grammarly isn’t a plugin, I HIGHLY recommend you get the Chrome Extension for it on your computer. Grammarly can prevent from tons of embarrassing typos—this extension will automatically highlight the mistakes and offer recommendations— it’ll proofread your blog drafts in WordPress, your emails, your social posts, etc. you’ll also upload docs to the web site and use the proofreader that way. It’s an enormous help!
Start Creating Content for Your Travel Blog
Step 4: Start Creating Content
You’re almost done! Now it’s time to feature content!
1. found out Your Main Pages
After you’ve uploaded your theme and plugins, you’ll want to line up your main pages additionally to the blog posts. to make a replacement page (or post), attend the left sidebar of your WordPress Dashboard and click on Pages > Add New. (Or, for a blog post, Posts > Add New.)
The difference between a page and a post is that a page may be a static piece of content that lives break away the blog. A post appears in your blog feed and comes up with the search tool. At the top of the day, your “pages” are benchmark “higher level” pieces of content that are the framing of the web site . Your blog posts are the articles that you simply share.
About Me Page: one among the primary things most users will click is your About page. Make it’s easy for readers to find out more about you and make it clear what they’re going to get on your site.
Contact Page: Create a page in order that people can reach out! make certain to be to state what quite emails you’ll or won’t answer so people don’t send you spam.
As your site grows, you’ll find that you simply got to create additional pages to feature your top blog posts. My most visited pages are About, Start Here, and Destinations.
2. Learn the fundamentals of SEO
High-quality, consistent content that’s within your niche is significant .
Before you begin writing, get conversant in SEO and using keywords. Resist the urge to find out as you go. You’ll waste plenty of your time later down the road optimizing posts that aren’t SEO-friendly (take it from my experience!). More importantly, you would like people to be ready to find your content on Google search.
Yoast’s Blog and Backlinko are great resources for learning the fundamentals of SEO and implementing them on your travel blog from day one. (Thank me later.)
3. Create a Content Schedule
While you’re familiarizing yourself with SEO, establish a content schedule. find out a uniform schedule that works for you and stick with it. And by consistent, that would mean once every week or once each day counting on your goals and therefore the amount of your time it takes for you to make high-quality content.
I post a day , Sunday to Thursday. Friday and Saturday tend to be lower traffic days, so those are my “days off.”
To gain momentum, you are doing got to post as often as possible. consider it this way– you would like to offer people a reason to return back, and once they do, you would like there to be something new for them to read. Otherwise, they probably won’t come .
Helpful Articles:
79 Best Travel Blogger You Should Follow on Instagram
My Favorite Gear for Travelers 2021
10 Skillshare Courses Perfect for Bloggers
4. Create “Pillars” of Content
This is a part of my personal content strategy. once you first start, it’s best to stay to 2-3 categories that you simply can specialise in and make many content for. Then, expand from there. for instance , a category might be anything from a selected destination, to a neighborhood or a kind of travel. you’ll start with Solo Travel, European Travel, and Fashion. or even Blogging Tips, and Photography etc.
Build out three to 5 pieces of content for every of these categories before you diversify further. That way, if someone involves your site for any of these interests, they need plenty to read.
5. Beautiful Images and Graphics
Everyone loves visuals, and that’s very true for social media and Pinterest! Getting your travel content out on social media platforms is SO important when it involves growing an audience and gaining organic readers (that will keep returning to your site again and again).
The best thanks to do that is to use high-quality images and graphics for every blog post you share.
Unsplash: For beautiful, high-res, royalty-free images
Adobe Suite for Photographers: i exploit Adobe Photoshop and Lightroom Classic to style Pinterest and sidebar graphics and edit my photos
TBA Presets for Lightroom: I edit all of my images with my custom presets to make a uniform esthetic on all of my photos
Canva Pro: An awesome and free resource to make custom graphics
If you’re trying to find more in-depth advice, I even have developed a really detailed and robust blogging course that uses my years of blogging expertise to assist you begin , grow, and monetize your website. It gives you an honest check out how I run this website and features detailed analytics, tricks, tips, and expert insight into what I do. You’ll learn everything i do know about creating a successful blog.
I will assist you create engaging content, establish an enduring brand, master SEO, grow your social media following, and make money. i will be able to offer you the tools for fulfillment — then show you ways to use them! Launching very soon!
BONUS: Passion vs. Success in Blogging
Before you allow this page, I wanted to supply something that I feel tons of “getting started guides” leave out—sage advice.
I started my blog in 2020. I am Digital Marketer & Social Media Manager Being a full-time working professional, my creativity didn’t get a chance to shine that way. After some time, I went to visit Darjeeling, a place with the reflection of nature’s beauty. There, I felt I was leaving imaginary me somewhere behind and decided to visit those far-off places I’d dreamt of as a kid that’s why I started this blog.
I don’t want to offer you another step-by-step guide. i would like to assist you achieve success .
Consider this “Bonus Step” an additional step because I care and that i genuinely want you to succeed, and therefore the only thanks to do this is to offer you a healthy dose of realness. So, bear with me as I share a number of the deep stuff before you dive deep into blogging.
Stick-Figures
(Yes, I even took the time to draw you this)
I am so grateful for the incredible experiences that i buy to possess as knowledgeable travel blogger.
While it’s easy to start out a blog “physically,” it requires countless hours of (99% unpaid) work, creativity, and, above all, the determination to create and sustain a brand.
While travel blogging might sound sort of a permanent vacation, you sometimes aren’t seeing the insane amount of labor that goes into writing, creating content, shooting photos, editing videos, and sharing to social media. If you would like your travel blog to achieve success , you’ve got to start out with pure intentions and therefore the motivation to share your passion with others. Otherwise, you’ll blow out .
Ask any successful person what they love most about what they are doing . Then, ask them what they hate about it.
The reason I bring this up is that tons of individuals see successful travel bloggers and need to pursue the life-style , in order that they start a blog to achieve it. But often, the work that’s involved in running a blog isn’t necessarily aligned thereupon person’s interests.
If you would like to be a successful blogger, you would like to like what you are doing . I wouldn’t normally say this about someone’s profession. But, with blogging and most entrepreneurial pursuits, I find it to be true. You don’t got to like to be a banker to urge up and attend add the morning. Maybe the salary justifies the pain. With blogging, you ought to probably enjoy most aspects of the workload in order that you’ll get through the periods of burnout.
Otherwise, you go down an equivalent path as any career that you simply resent.
Of course, we all like to travel. But ask yourself, “Am I hooked in to photography, writing, being active on social media, and being in constant communication with my community?”
The reality of turning travel into your job is that you simply often are working quite you’re traveling—even if you’re in an exotic destination.
However, my passion for traveling, connecting with other travelers, helping people travel better, , and writing would still be here no matter having an enormous audience or not. that zeal outweighs the items I don’t love about what I do, which is how I’ve stuck through it of these years.


